Automated analysis reports
Get a recurring email summary of your surveys' response changes, delivered to your inbox. You don't have to check the dashboard manually. Every report includes an AI Insights section that reads your responses. It tells you what's changing and what to do about it.
Prerequisites
- A verified notification email (see Step 2)
New installs get a Default weekly report already created and turned on, so there is nothing to set up. It sends every Monday around 9:00 PM Vietnam time. An existing automated report from before this upgrade carries over unchanged and isn't replaced by Default.
Steps
Step 1: Open report settings
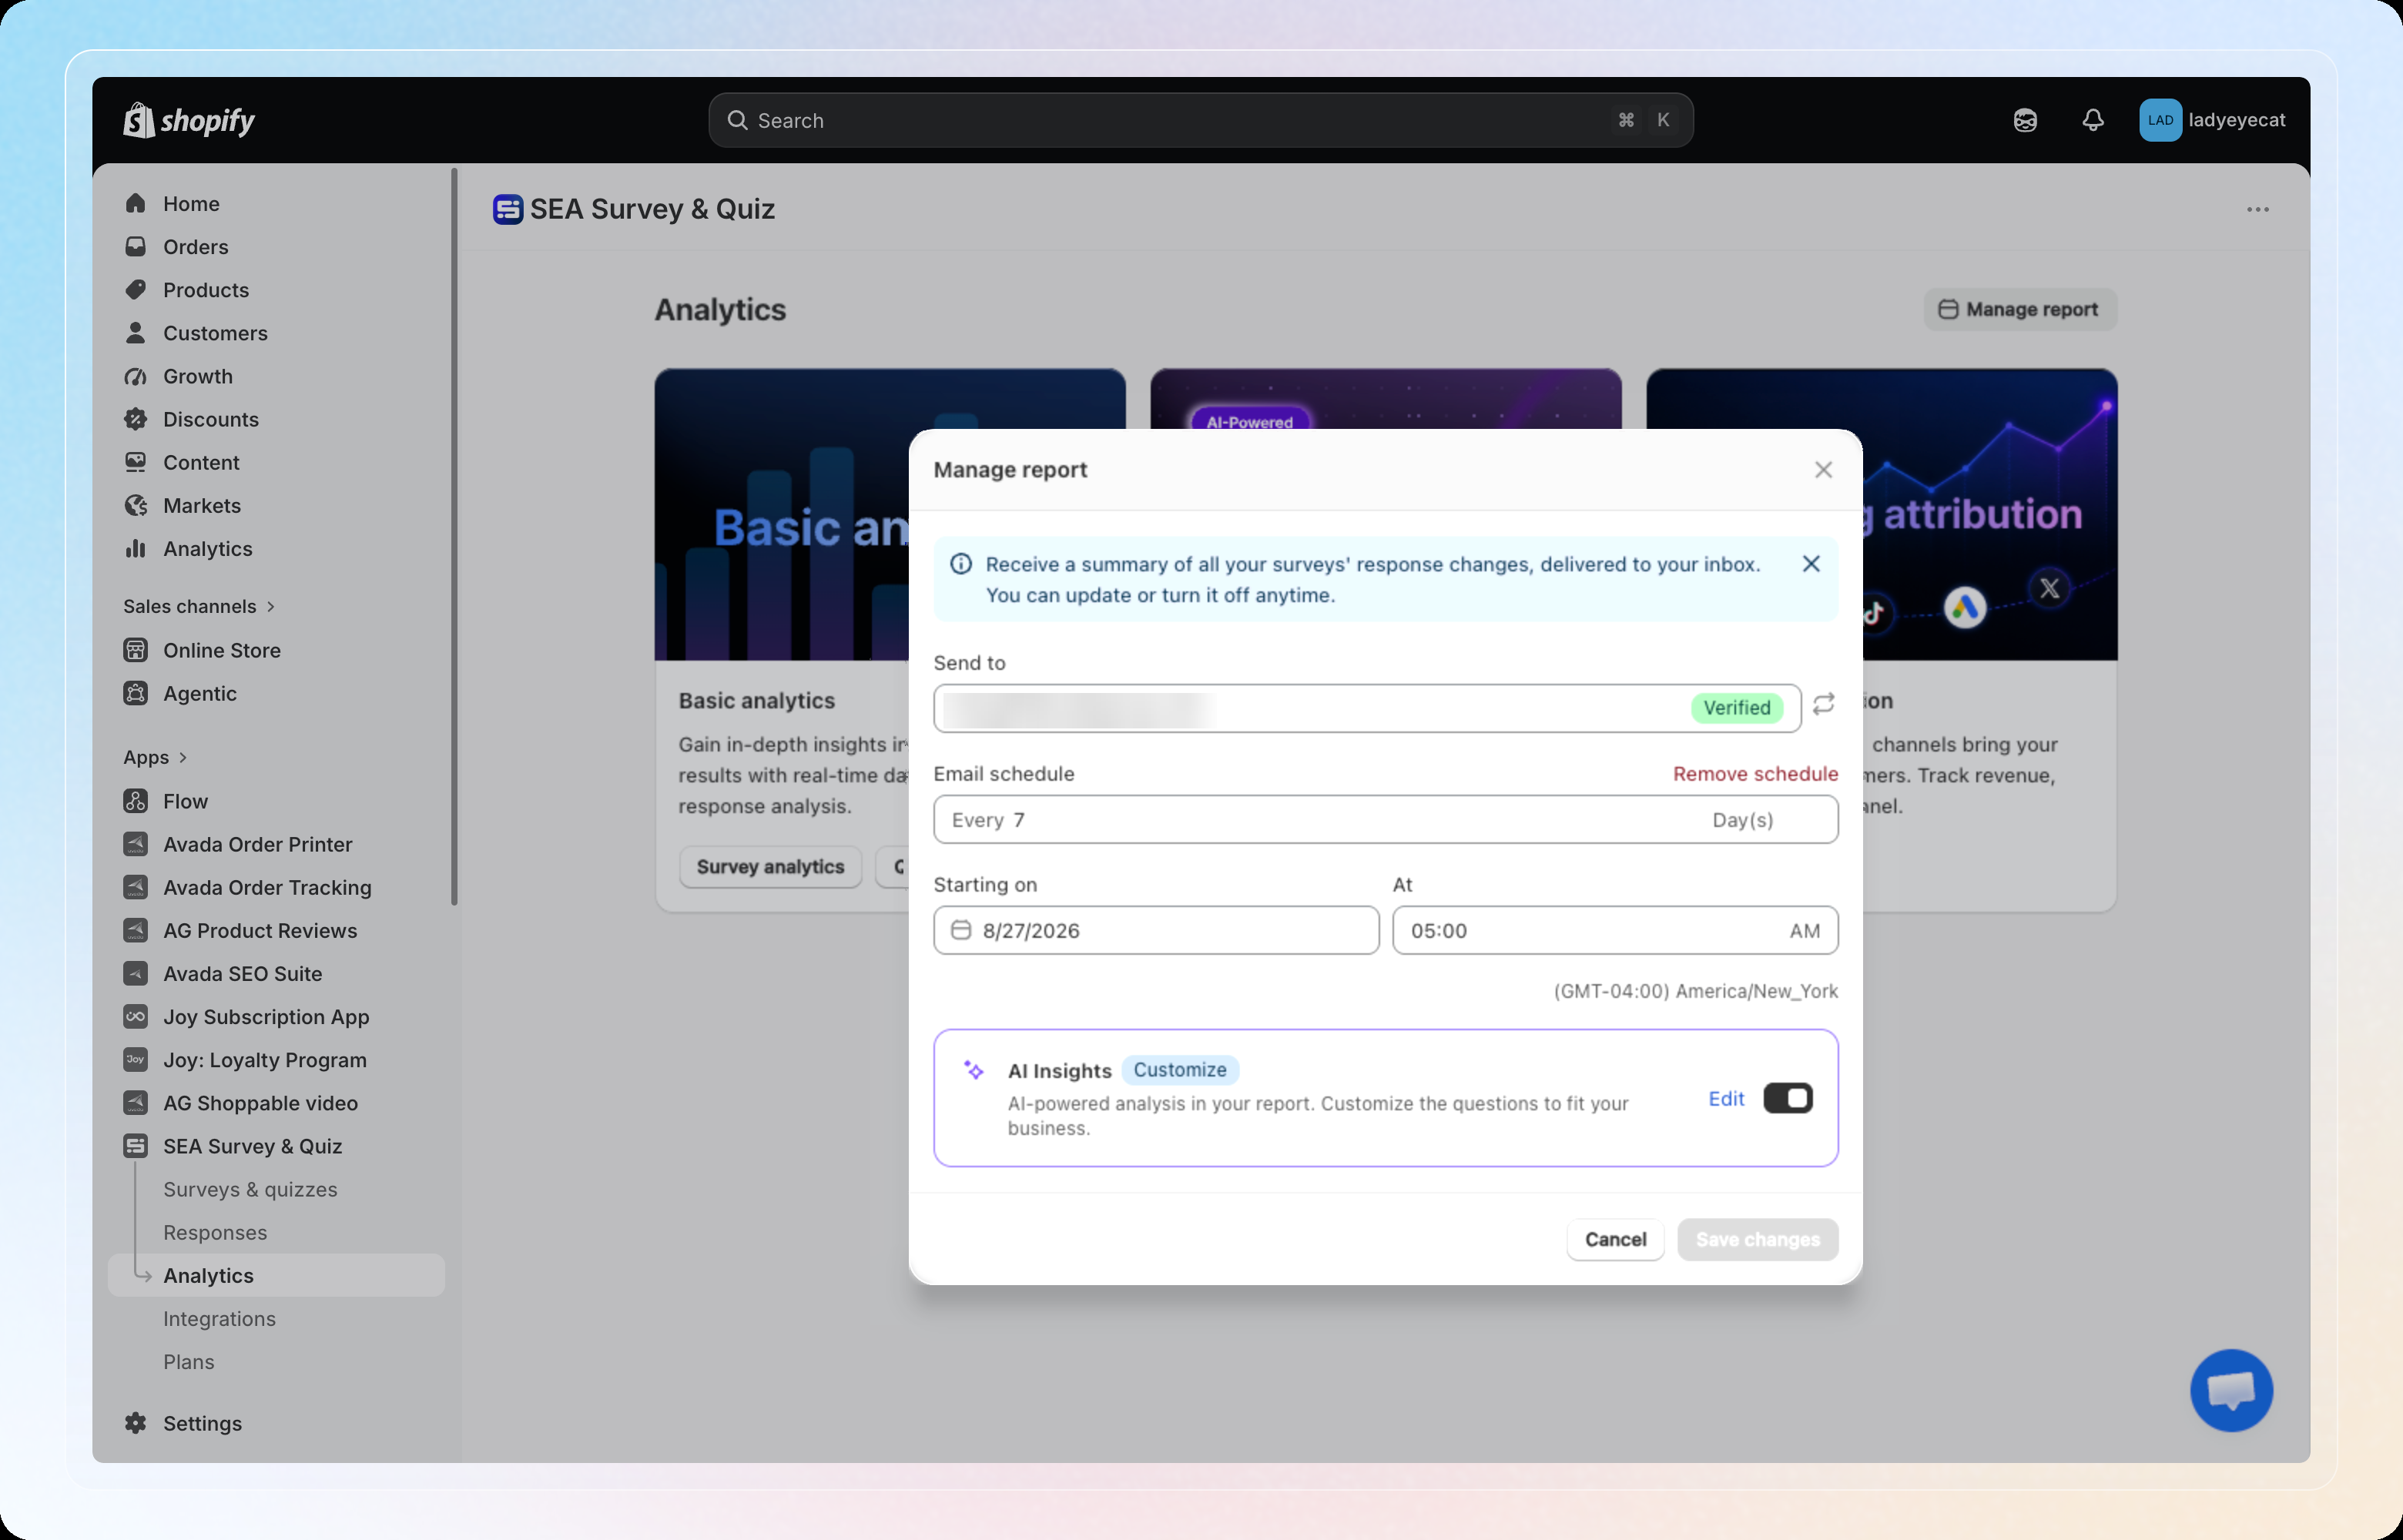
Go to Analytics, then click Manage report. On your first visit to Analytics, this modal opens automatically.
Step 2: Verify your send-to email
Enter the Send to email address to receive reports. It must show a Verified badge before you can save. If it's unverified, verify it first. Click the refresh icon next to the field to recheck the verification status without requesting a new email.
Step 3: Set your schedule
Set Email schedule to send every N day(s) (minimum 7). Then set Starting on (date) and At (time). The timezone shown is detected from your store.
Step 4: Choose your AI Insights mode
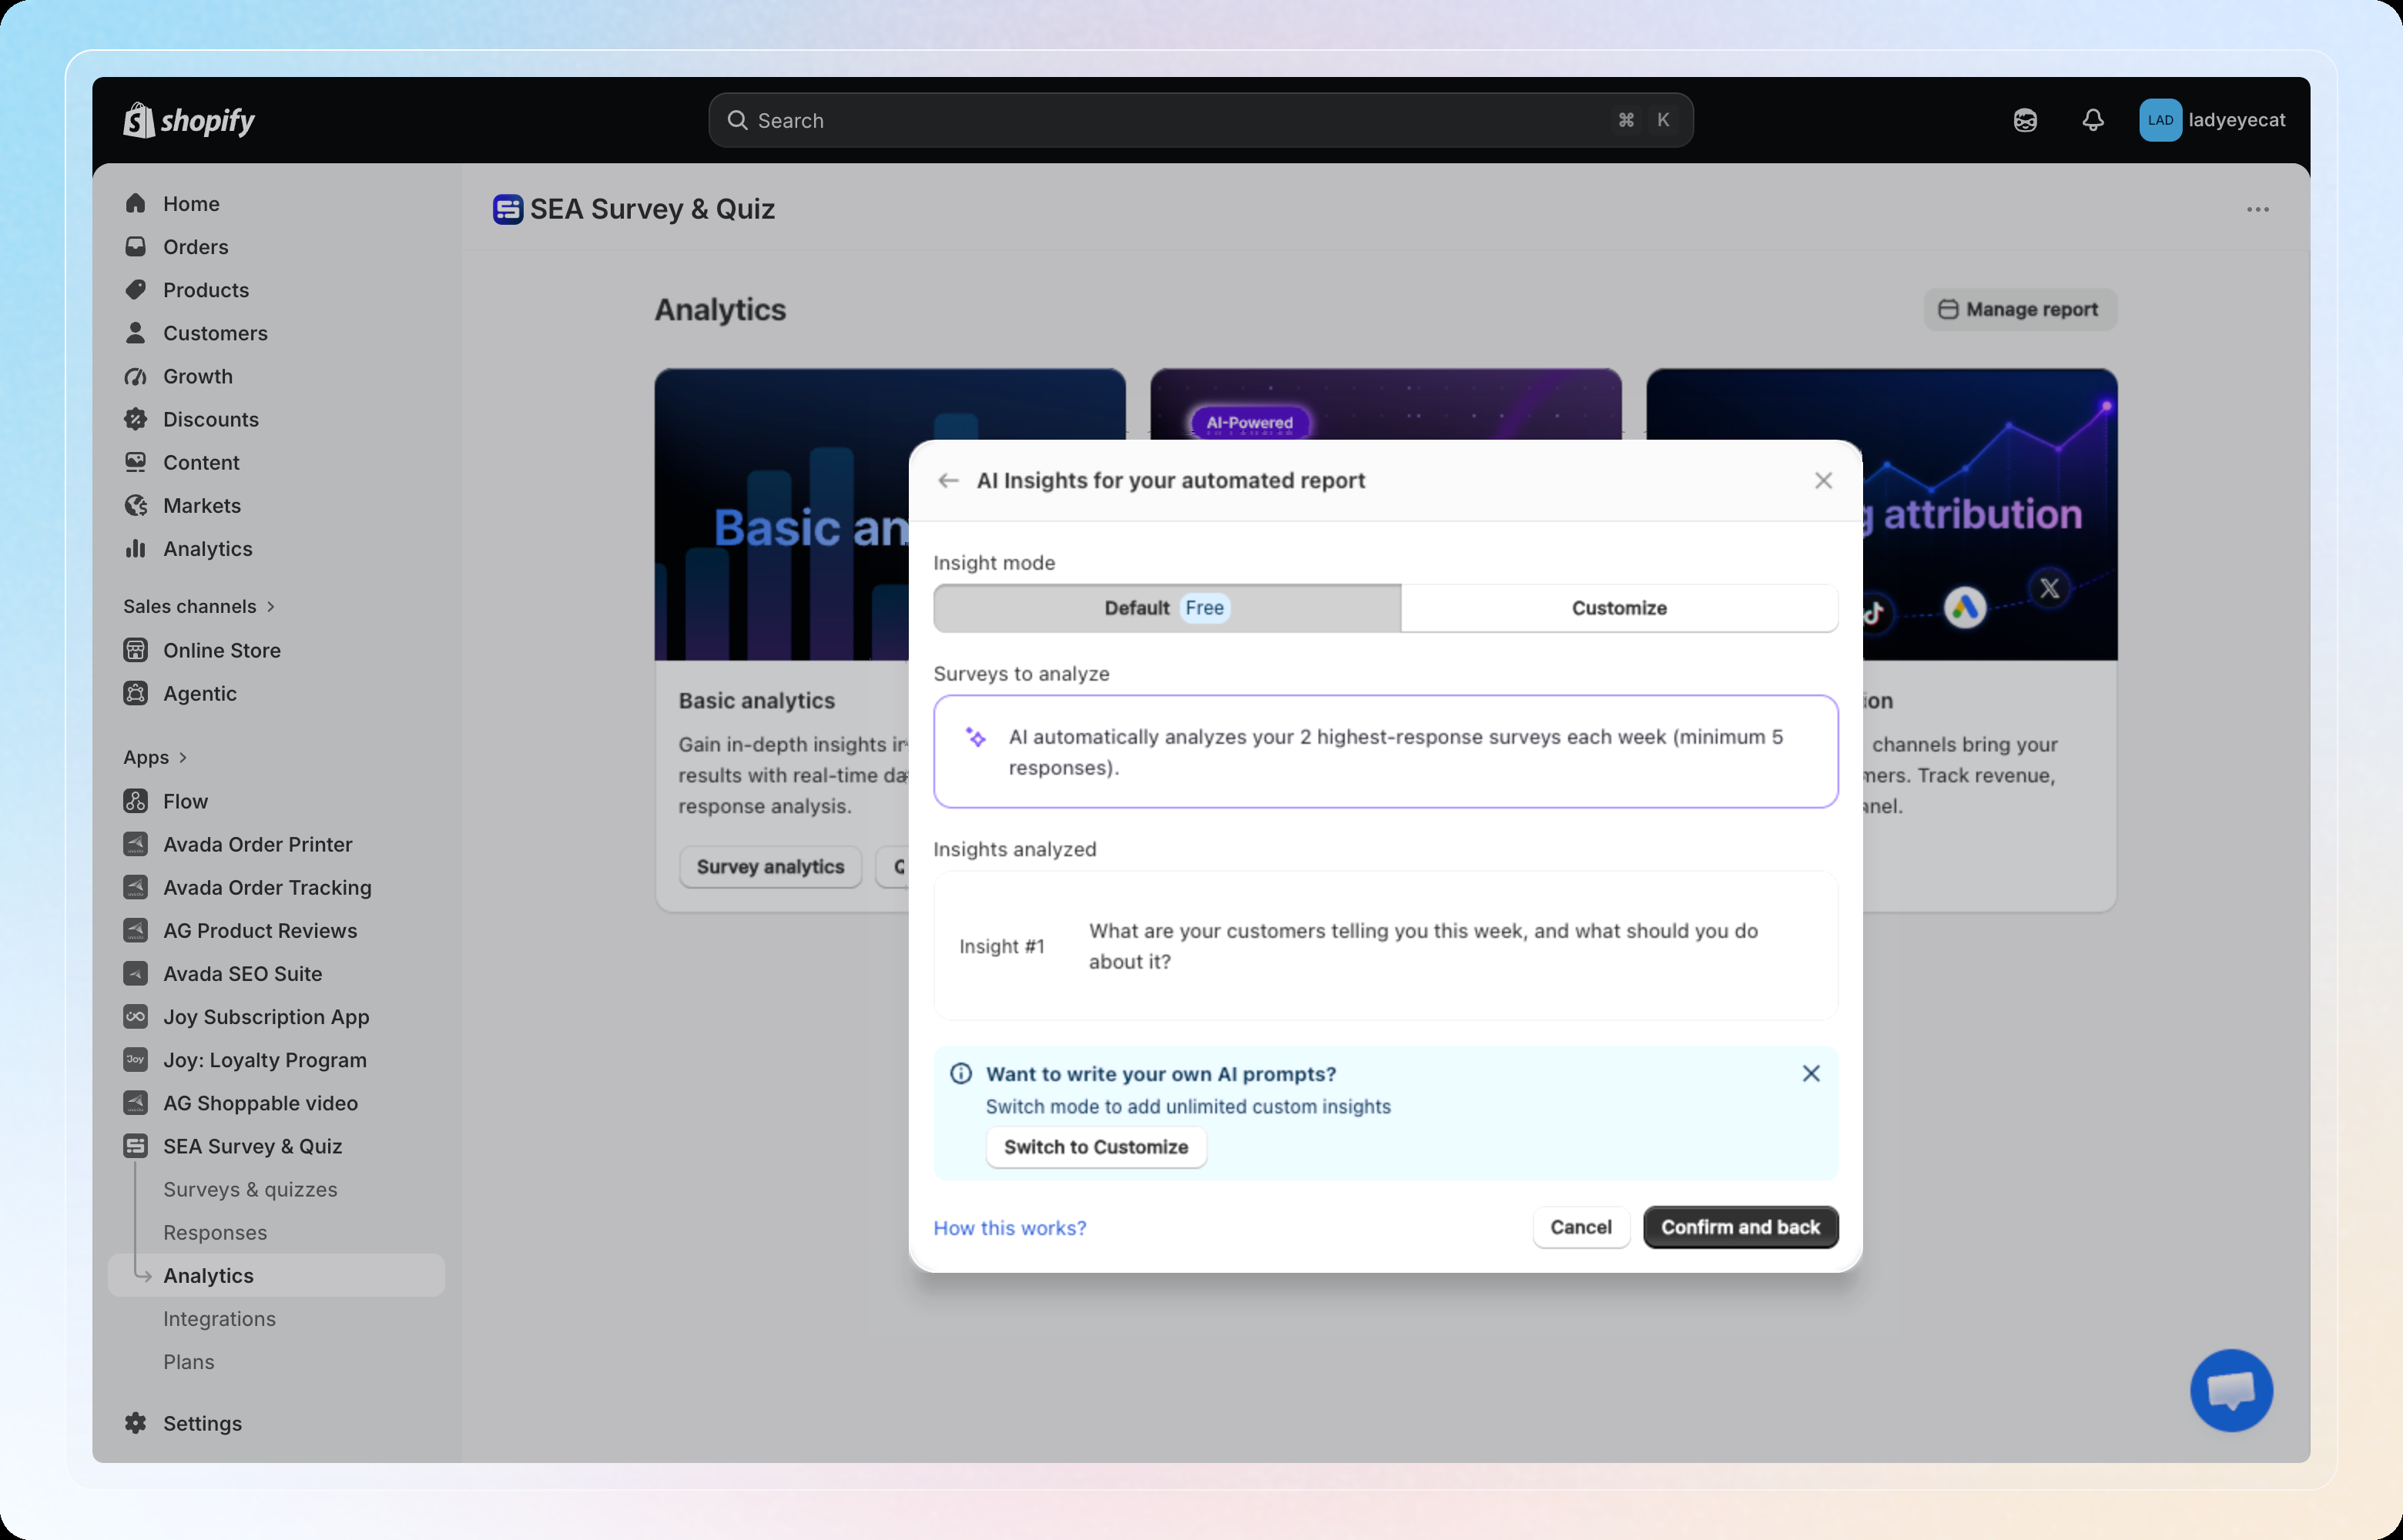
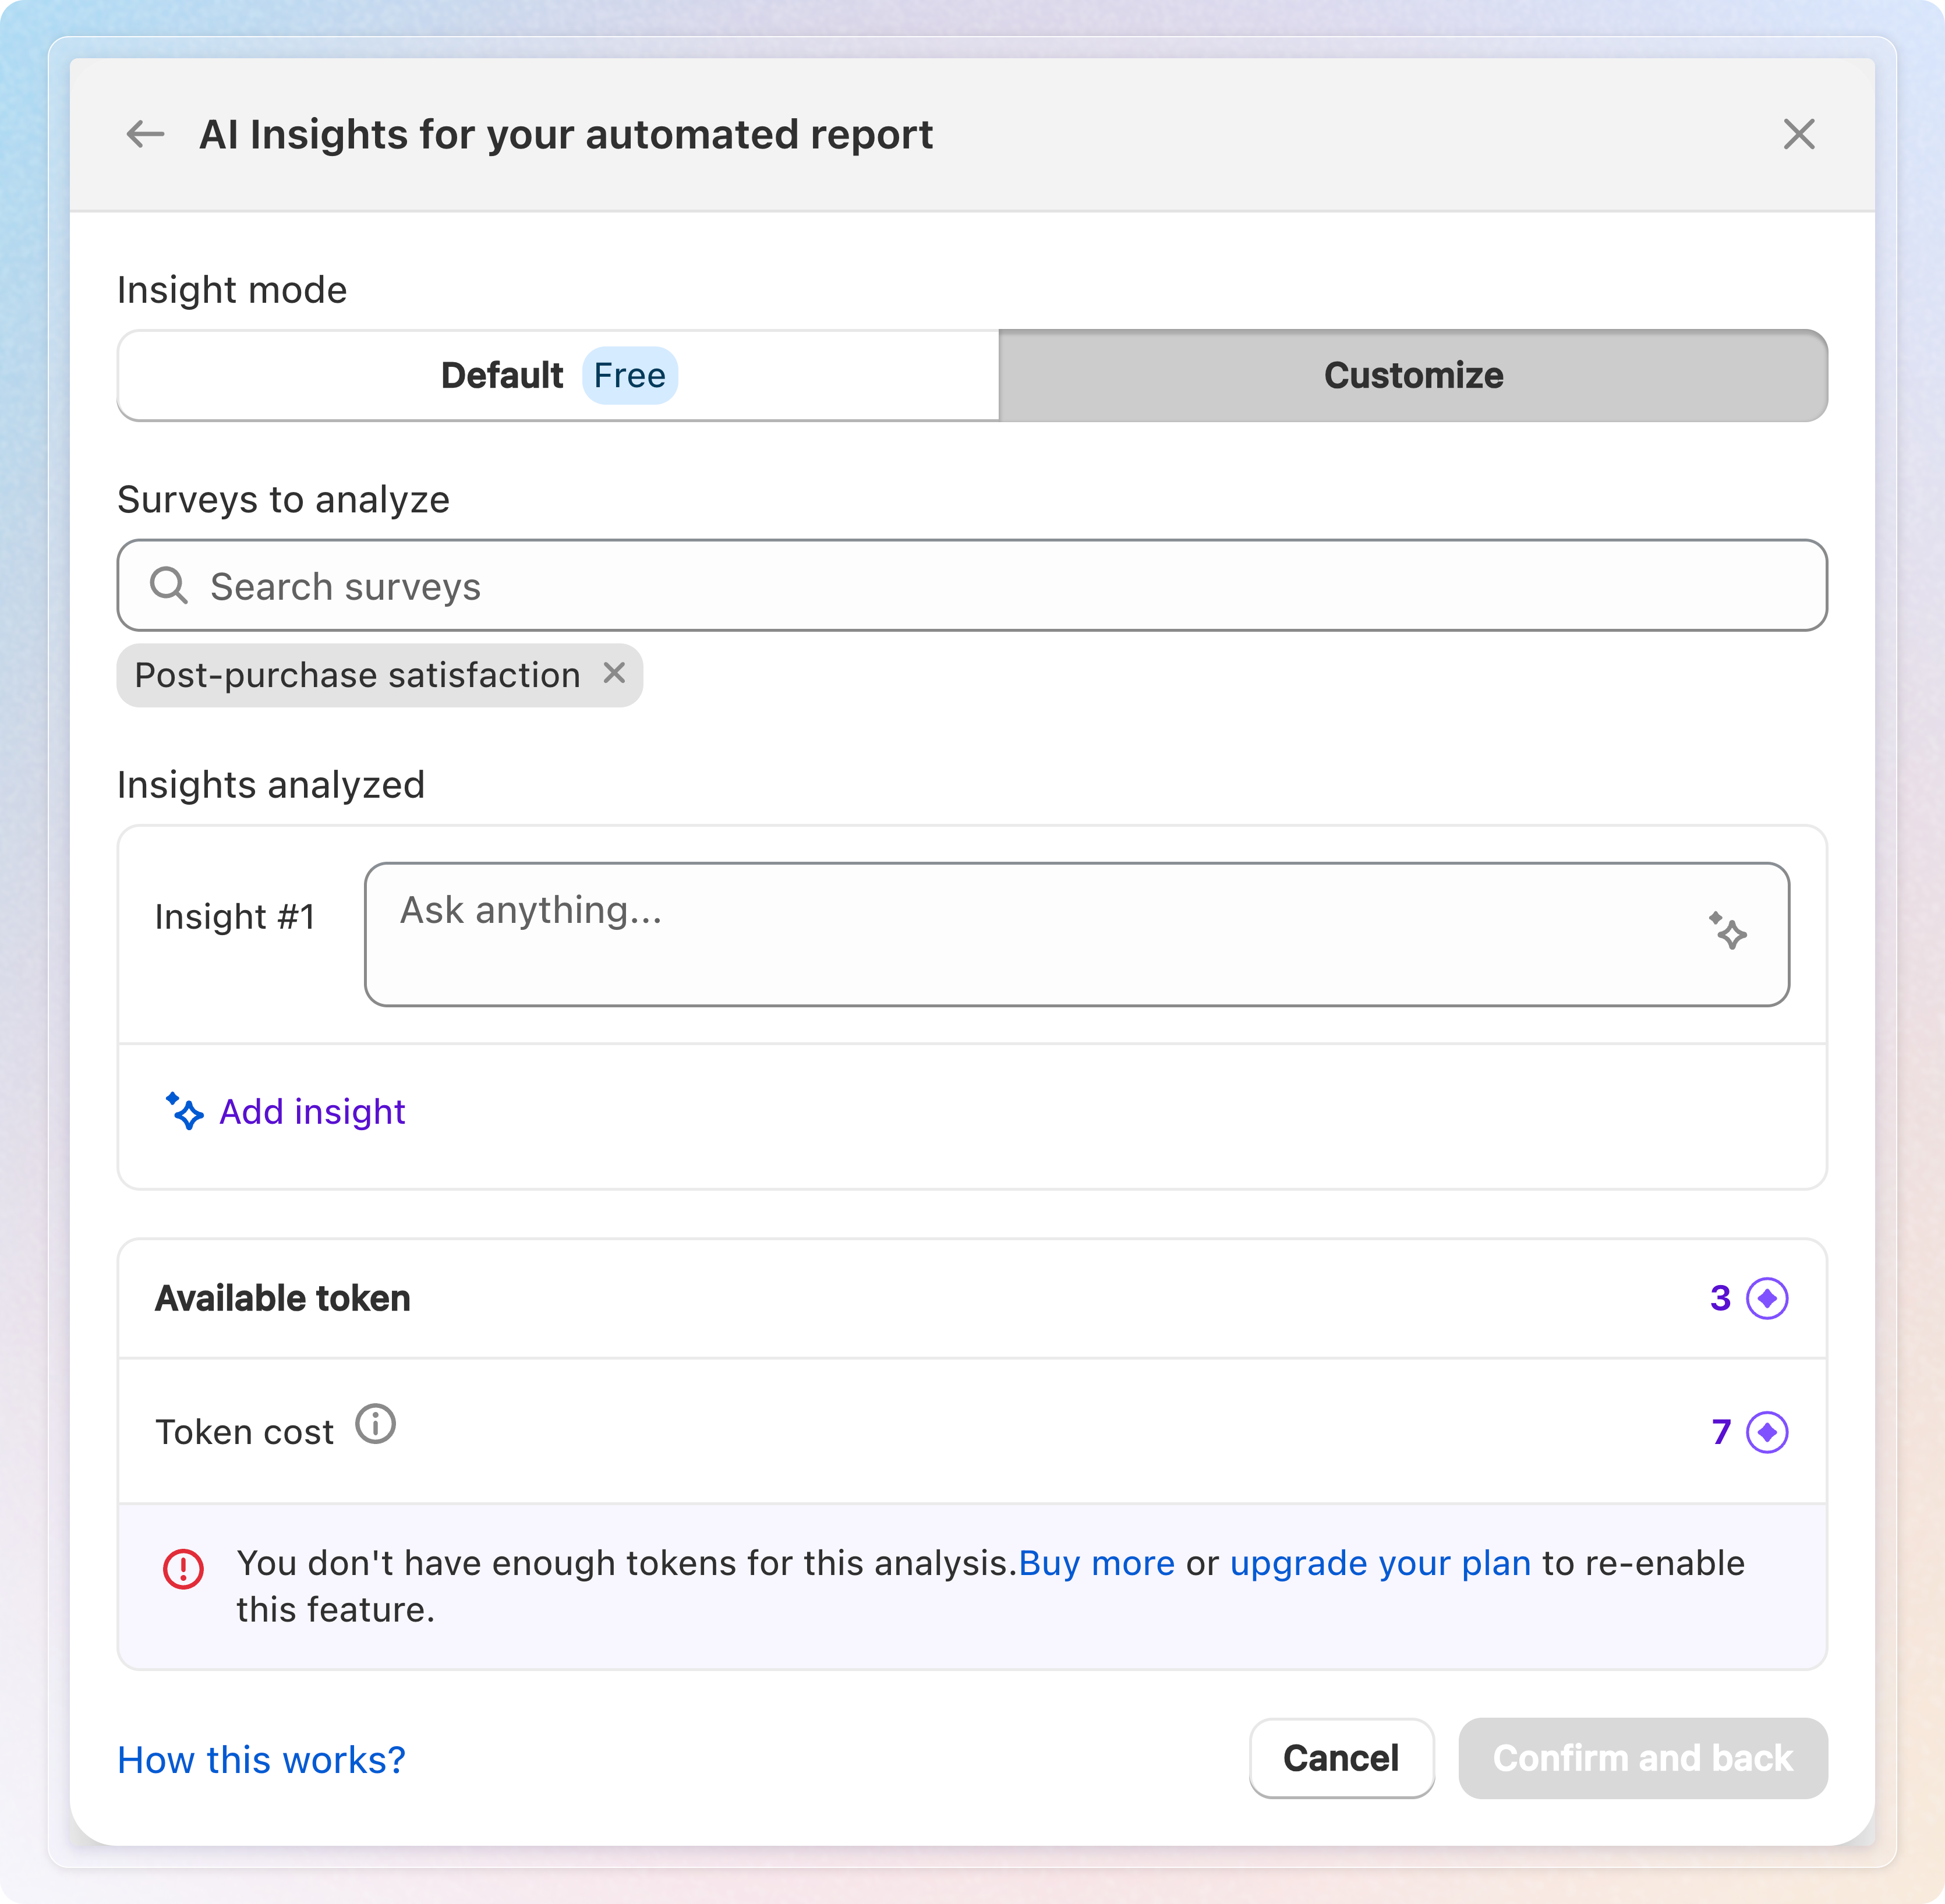
Click Edit on the AI Insights card to open Insight mode:
- Default (Free): AI automatically analyzes your 2 highest-response surveys each week (minimum 5 responses each). The fixed question is: "What are your customers telling you this week, and what should you do about it?" Each analyzed survey gets one insight plus one suggested action. No tokens used.
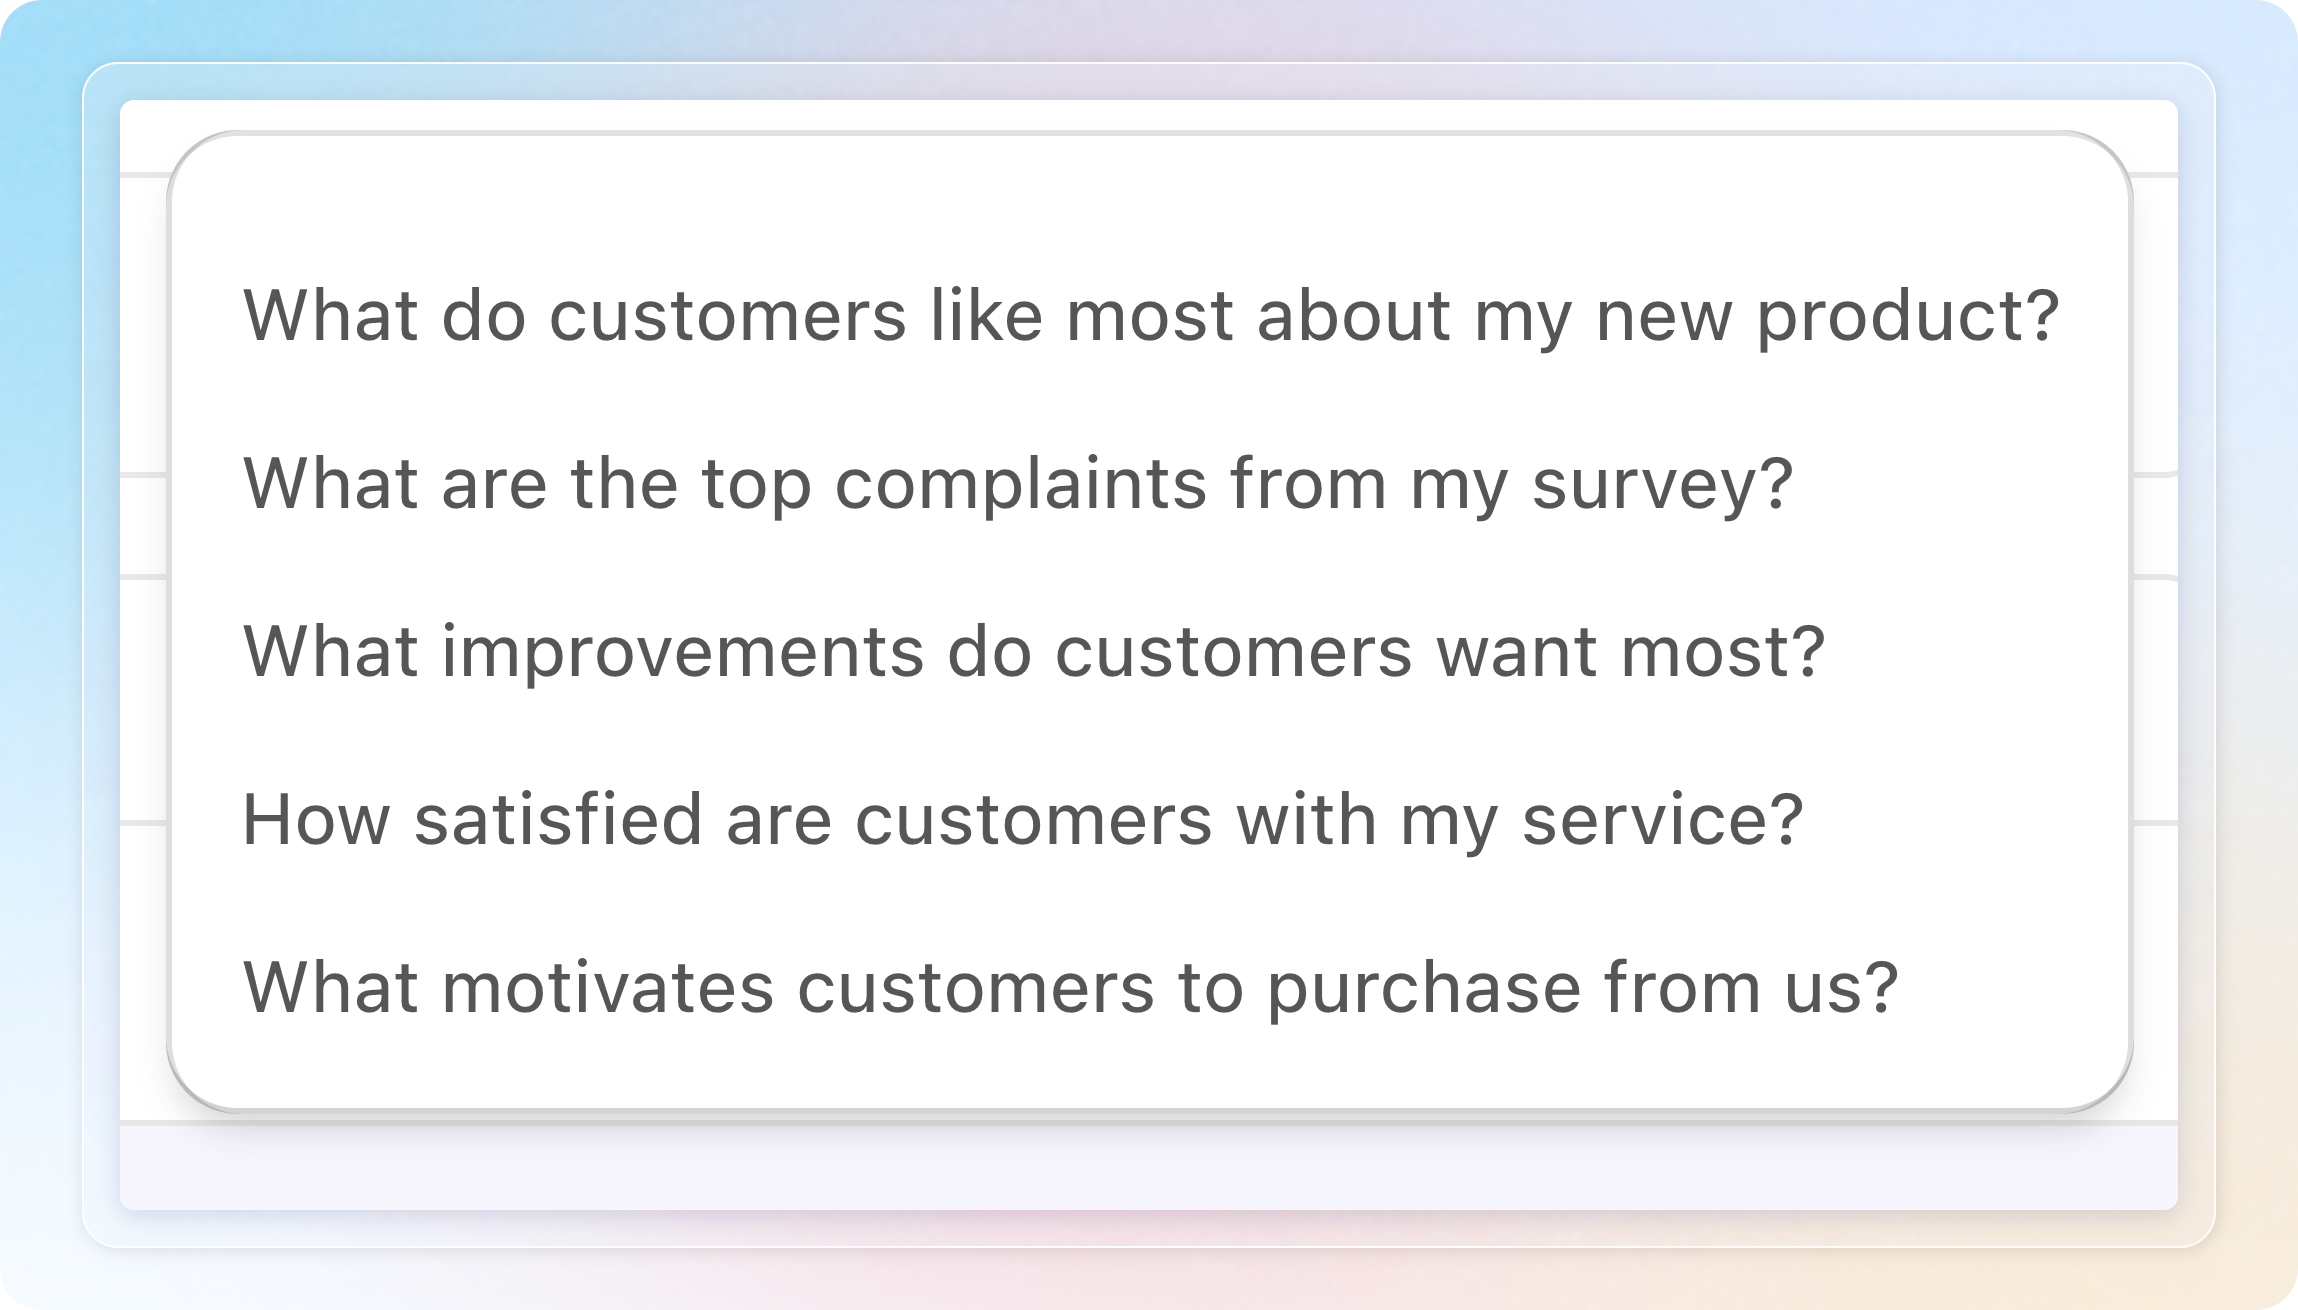
- Customize: Pick up to 2 surveys yourself and write your own prompts (Add insight for more than one). Click the magic wand icon inside a prompt field for 5 suggested questions. For example: "What are the top complaints from my survey?" Each report costs AI tokens (shown as Token cost, checked against your Available token balance).
While you're on Default, a banner suggests switching to Customize. You can dismiss it. It shows again the next time you open AI Insights.
The AI Insights toggle turns the whole report feature on or off, it's on by default for new stores. Turning it off (not just switching mode) stops the scheduled email entirely.
Token costs (Customize only):
- How cost is calculated: 1 response equals 1 token. A report analyzing a 50 response survey with 2 questions costs 100 tokens (50 responses times 2 questions).
- See the cost before you confirm: the modal shows your Available token balance and the estimated Token cost. Click Confirm and back to proceed.
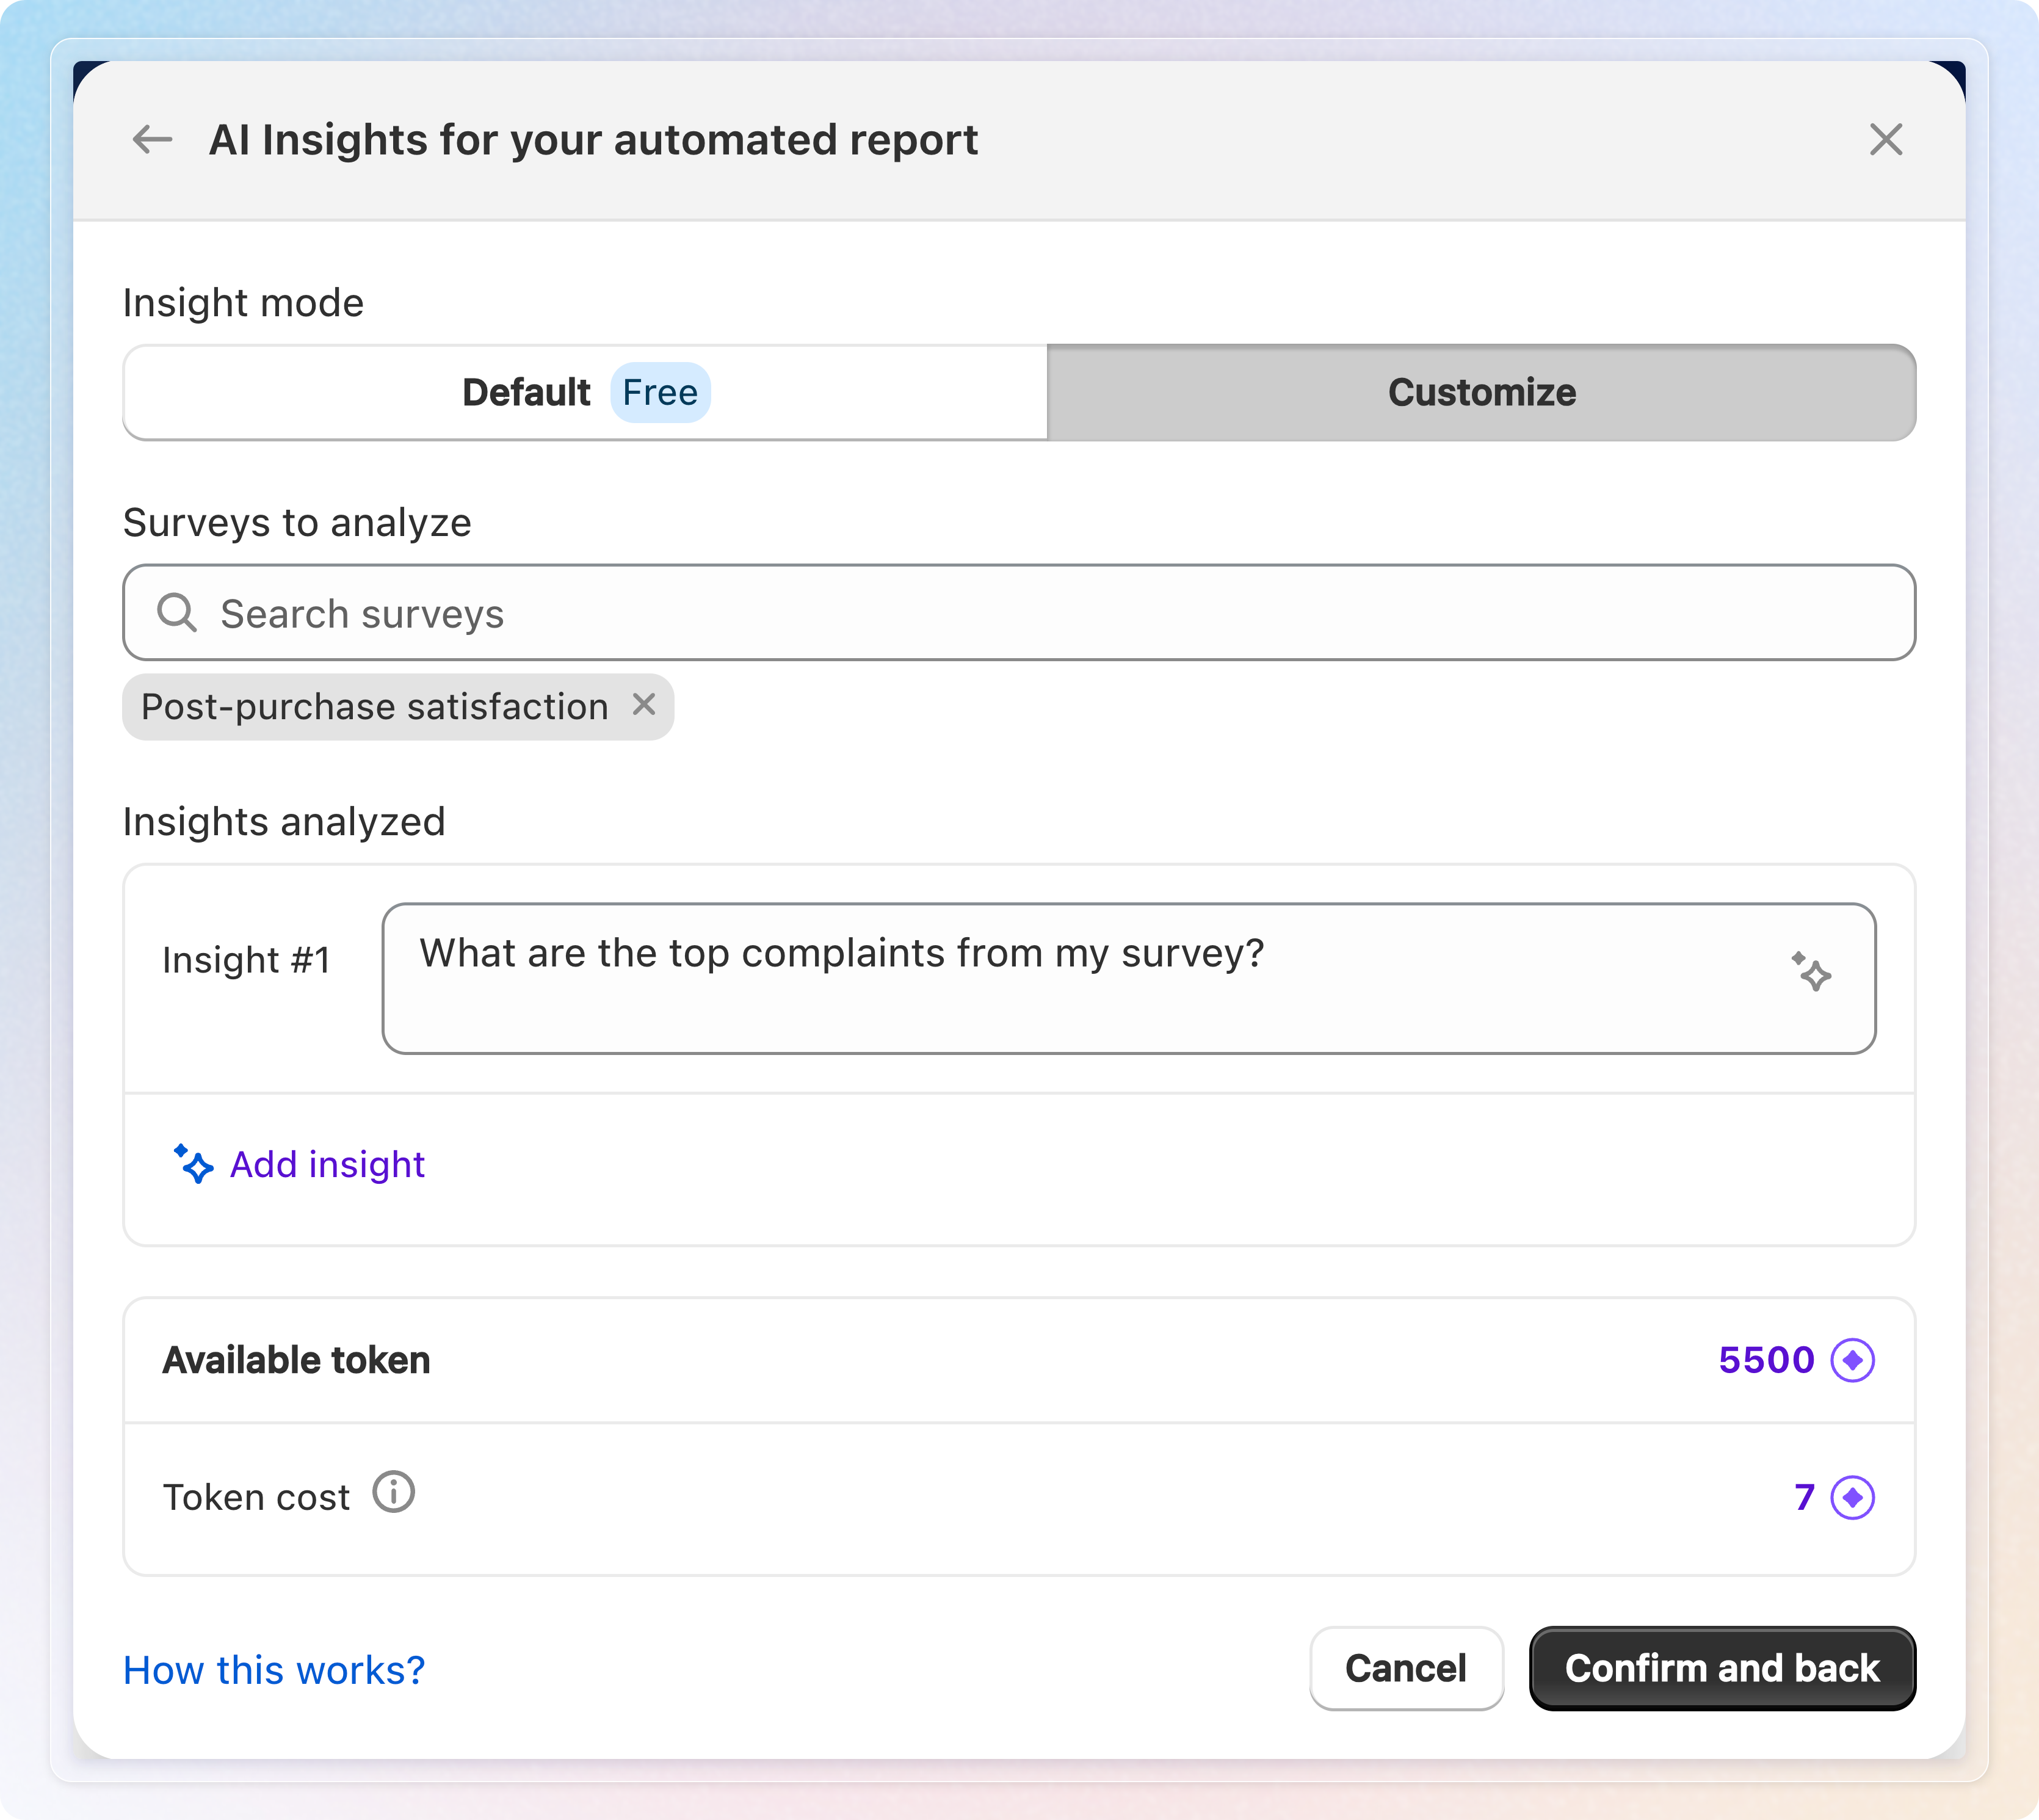
- When tokens are charged: only when a report is actually sent, never when you save your setup.
- Not enough tokens: a banner appears offering to Buy more tokens or upgrade your plan. Free tokens are not granted automatically to new installs. A one time 500 token grant (3 month expiry) went only to stores using SEA Survey when this feature launched. You can still use Customize anytime by buying a token pack or through your plan's monthly token allowance, from Plans.
Step 5: Save
Click Confirm and back, then Save changes on the main modal.
Managing your report
- Edit anytime: reopen Manage report from Analytics to change the recipient, schedule, or AI Insights mode.
- Switch modes freely: moving from Default to Customize (or back) doesn't lose your settings. Each mode remembers its own configuration.
- Remove the schedule: click Remove schedule to stop recurring emails without deleting your AI Insights configuration.
Send conditions
- Email not verified: the schedule stays active, but no report sends and AI doesn't run until you verify. Once verified, sending resumes automatically from the next scheduled cycle.
- No survey has enough responses (Default only): that week's cycle is skipped if no survey reaches the minimum 5 responses. No email sends that week. Customize always sends on schedule. It won't include AI insights that week if your selected surveys got no responses.
- Other active surveys (Default only): the email also lists other surveys with responses that week. It shows them as short "+X responses" lines, even though they weren't analyzed.
Plan availability
- Report scheduling (recipient, cadence, start date and time): available on every plan.
- AI Insights: not included on legacy Free plans installed before SEA Survey introduced pricing. The AI Insights card doesn't appear for these stores.
- Customize mode: needs AI tokens. Growth and Premium plans include a monthly token allowance. On any plan, you can also buy a token pack anytime from Plans.
Tips
- Default mode is a good starting point. It needs no tokens and no setup: it picks your most active surveys automatically each week.
- Switch to Customize when you want the report to focus on a specific survey. Or ask a specific business question, like "What's driving low satisfaction scores this week?"
- Click How this works? in the AI Insights sub-modal for a breakdown of token costs before switching modes.