Working with Mailchimp
What is Mailchimp Integration?
Mailchimp integration allows you to automatically send survey responses from logged-in customers directly to their profiles in Mailchimp. When a customer submits a survey, their response data is added to their Mailchimp profile as an event, and a tag is created to help you segment and define improved actions based on their survey participation.
This integration creates a seamless connection between customer feedback and your email marketing, enabling you to build more personalized and data-driven campaigns.
Why Use Mailchimp Integration?
Connecting SEA Survey with Mailchimp provides powerful benefits for your email marketing:
- Engagement Tracking: Survey responses are added to Mailchimp customer profiles and recorded as events, giving you a clear view of customer engagement and survey participation.
- Smarter Segmentation Based on Feedback: Customers who complete surveys are automatically tagged, enabling precise segmentation using actual feedback and preferences instead of assumptions.
- Personalized & Automated Email Actions: Survey responses can trigger personalized follow-up emails and Mailchimp automations, helping you respond to customer intent without manual work.
How Mailchimp Integration works
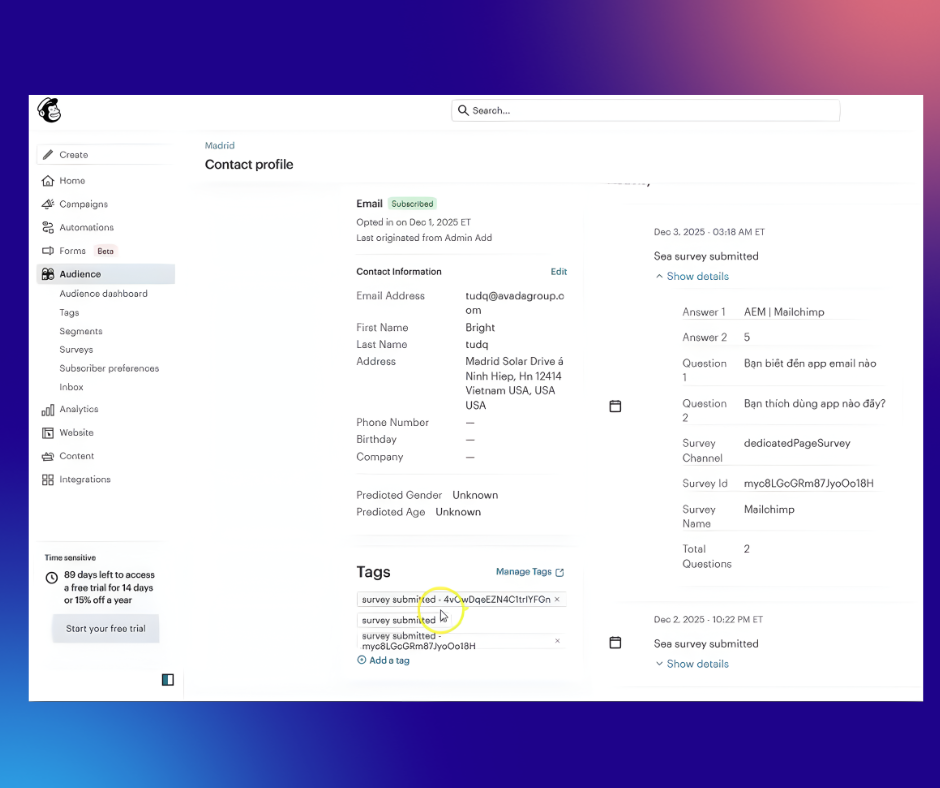
When a logged-in customer submits a survey, the following information is automatically sent to their Mailchimp profile:
Event created in customer timeline:
- Survey ID
- Survey name
- Questions asked, answers provided
- Page where survey was submitted
Tag added to customer profile:
- Format:
survey submitted {{survey_id}} - Example:
survey submitted 12345
Important: Only responses from logged-in customers are sent to Mailchimp. Anonymous responses are not synced.
Setting Up Mailchimp Integration
Before You Start
Make sure you have:- An active Mailchimp account
- Access to your Mailchimp API key
- A paid SEA Survey plan
-
At least one survey created in SEA Survey
Step 1: Generate Your Mailchimp API Key
First, you need to create an API key in your Mailchimp account.
- Log in to your Mailchimp account at mailchimp.com
- A new API key will be generated (format:
xxxxxxxxxxxxxxxxxxxxxxxxxxxxxxxx-us21) - Click Copy to copy the API key to your clipboard
- Save this key somewhere secure, you'll need it in the next step
Important: Keep your API key private. Anyone with access to this key can access your Mailchimp data.
Tip: The API key includes your Mailchimp data center (like -us21 at the
end). Make sure to copy the entire key including this suffix.
Step 2: Connect Mailchimp to SEA Survey
Now you'll add your Mailchimp API key to SEA Survey and select which surveys to sync.
- From your Shopify admin, open the SEA Survey app
- Navigate to Integration > Mailchimp
- In the API Key field, paste the Mailchimp API key you copied in Step 1
- Click Connect
- In the Select Surveys section, choose which surveys you want to sync with Mailchimp:
- Check the box next to each survey you want to enable
- You can select multiple surveys
- Click Save Settings
Your integration is now active! Survey responses from logged-in customers will automatically be sent to Mailchimp.
Step 3: Test Your Integration
It's important to test the integration to make sure data is flowing correctly.
- Log in to your Shopify store as a test customer (or use your own account)
- Complete one of the surveys you enabled for Mailchimp sync
- Submit the survey
- Go to your Mailchimp account
- Find the customer's profile (search by email address)
- Check that:
- A new event appears in their timeline with the survey data
- A tag has been added:
survey submitted {{survey_id}}
If you see both the event and tag, your integration is working correctly!