Survey Management
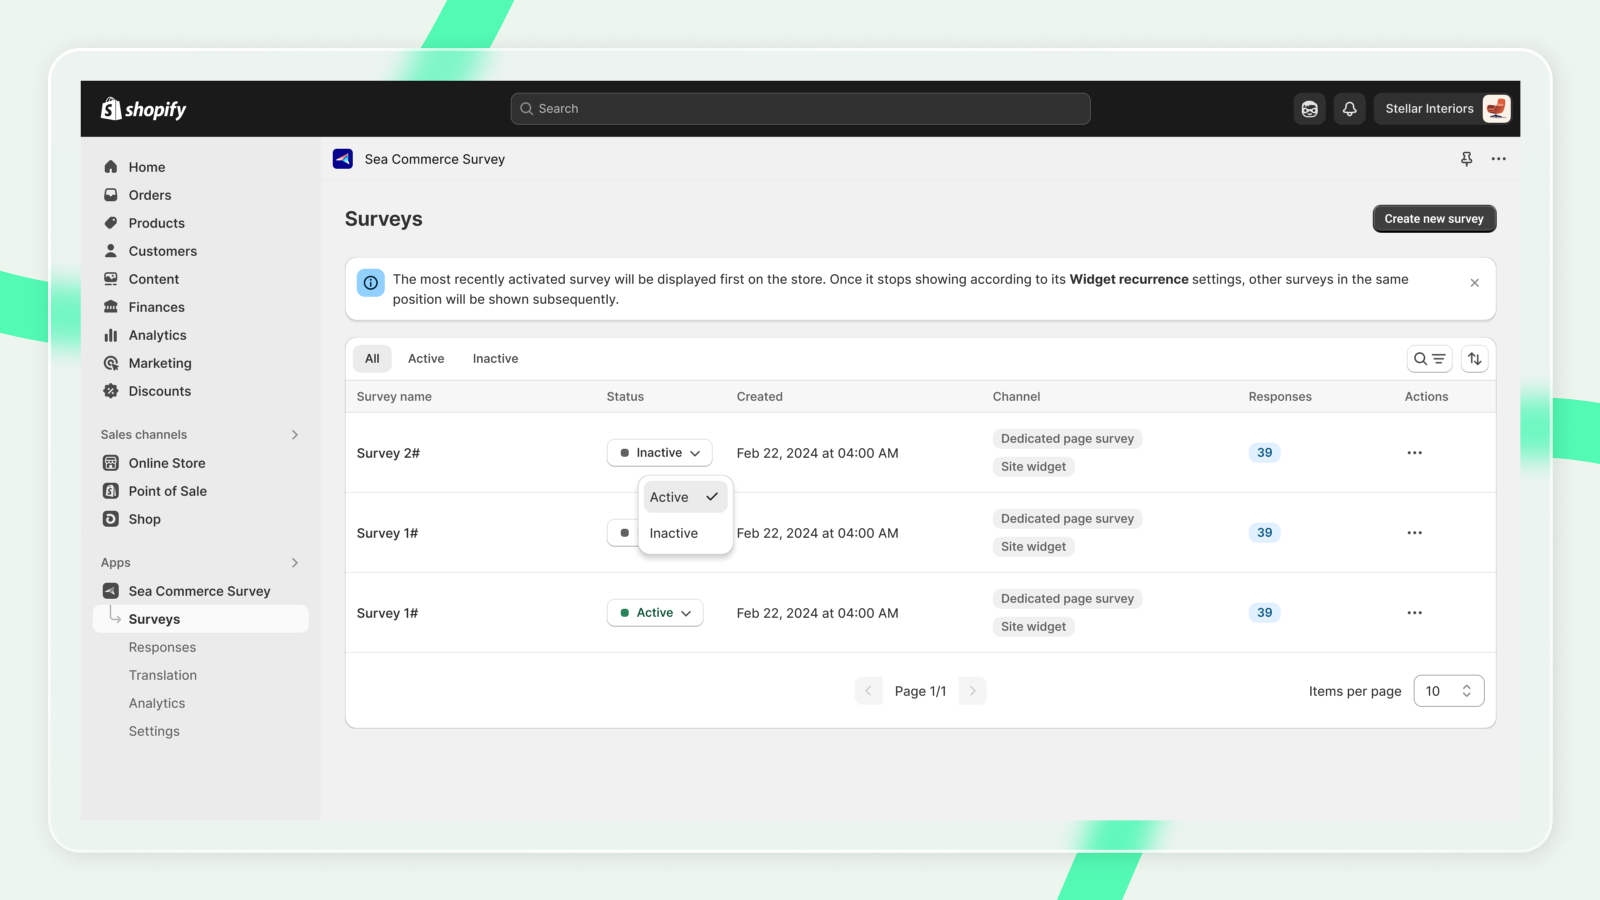
The Survey section gives you a clear overview of all your surveys in one place.
Presented in a user-friendly table format, it displays key details for each survey, including its name, status, creation date, and more.
This centralized view allows you to quickly track and manage your surveys with ease, ensuring you stay organized and in control.
Note: The most recently activated survey will be displayed first on the store. Only when that survey stops showing in accordance with its Widget recurrence settings, will other surveys in the same position and target customers be shown subsequently.
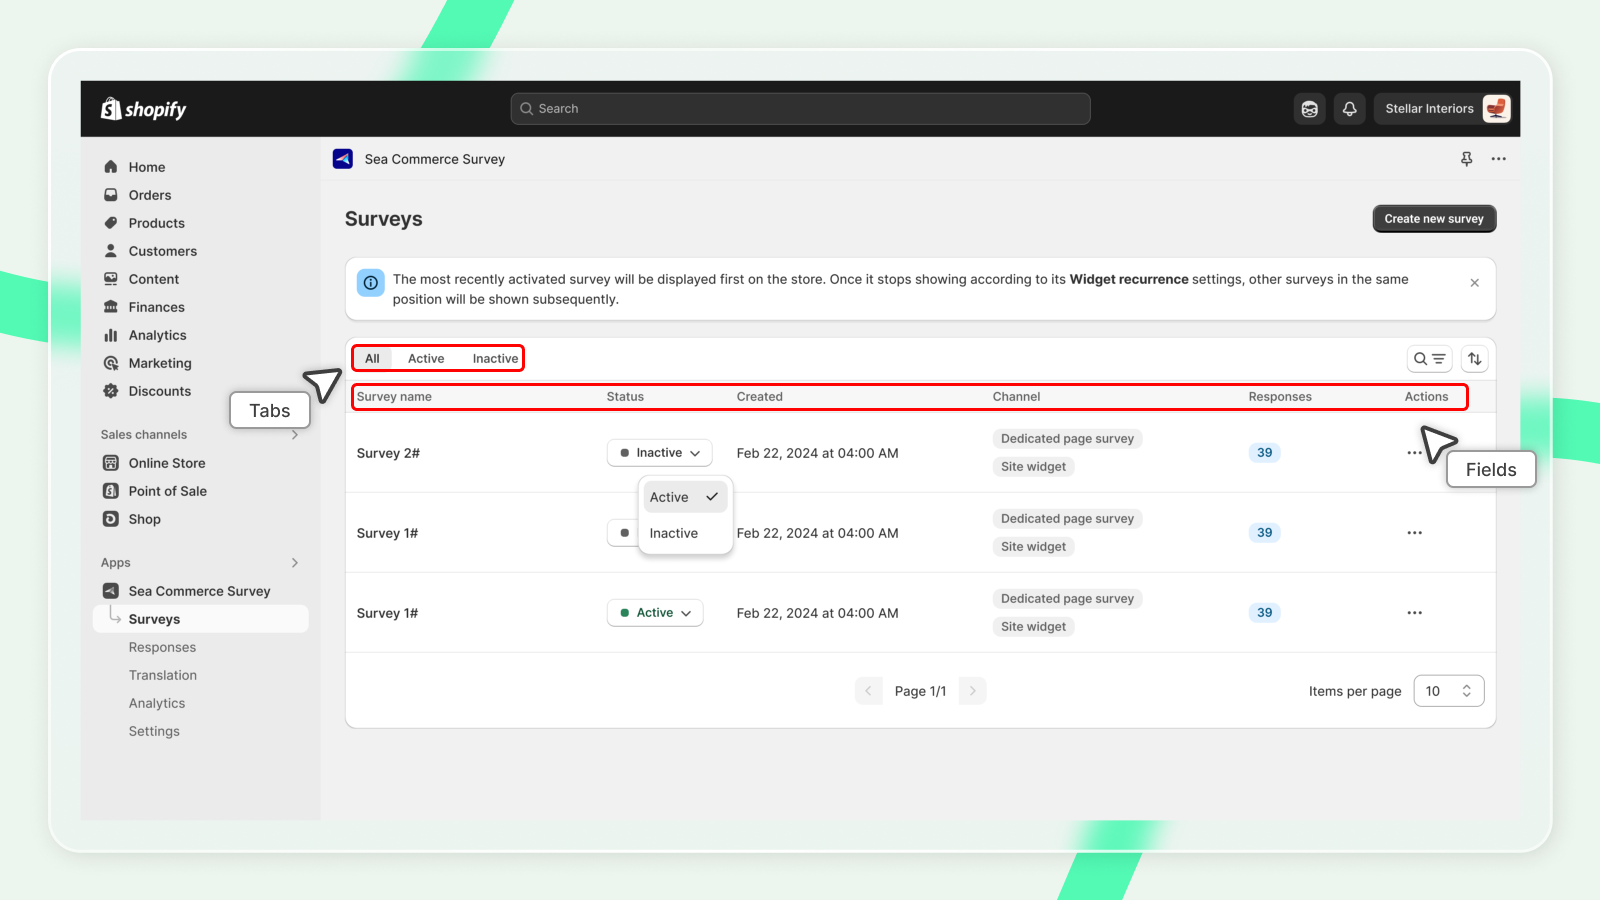
What you can see in Survey tab
The Survey Tab provides a comprehensive overview of all your surveys. Here's what you can expect to see:
Tabs:
- All: This tab displays all surveys, whether they are active or inactive.
- Active: This tab shows only the surveys that are currently live and collecting responses.
- Inactive: This tab includes surveys that are no longer active.
Fields:
- Survey Name: The title of the survey, which you created.
- Status: Displays the current status of each survey (e.g., Active, Inactive).
- Creation Date: The date when the survey was created.
- Channel: Shows where the survey is being displayed (e.g., dedicated page, site widget, post-purchase email).
- Number of Responses: The total number of responses collected for each survey.
This layout helps you easily manage and track the performance of your surveys at a glance.
What you can do in Survey tab
The Survey Tab not only displays your surveys but also provides a range of interactive features to manage. Here's a breakdown of what you can do:
Access Survey Setup Section: To create a new survey, simply click on the "Create new survey" button. This will take you to the Survey Setup section.
Interact with the Control Panel:
- Sort: Organize surveys based on
Number of responsesandCreation dateto make it easier to find specific surveys. - Filter: Apply filters to narrow down the list of surveys based on
Channels. - Search: Use the search bar to quickly locate a specific survey by
Name. - Items Per Page: Adjust the number of surveys displayed per page. You can choose to show 10, 20, 25, or 100 surveys at a time for easier navigation.
Change Survey Status:
You can change the status of your surveys by clicking on the dropdown menu in the Status column.
These tools give you full control over your surveys, allowing for easy management and better organization of your survey data.
Action on each survey:
- Edit: Update content, design, and settings. You can edit channels, edit existing content and add new content.
Be careful when editing existing content, the related responses will be deleted permanently.
- Duplicate: Create an identical copy of the survey.
- View response: Access the collected responses for that survey.
- Delete: Remove a survey from your system permanently. Confirm your choice to avoid accidental deletions.
In conclusion, the Survey section provides an intuitive and efficient way to oversee and control your surveys.
With a comprehensive table view of all your surveys, including important details like survey name, status, and creation date, you can quickly monitor, edit, and manage them.